Navigate to the Transfer window via the drag and drop
Step 1: Select the Source and Destination Locations
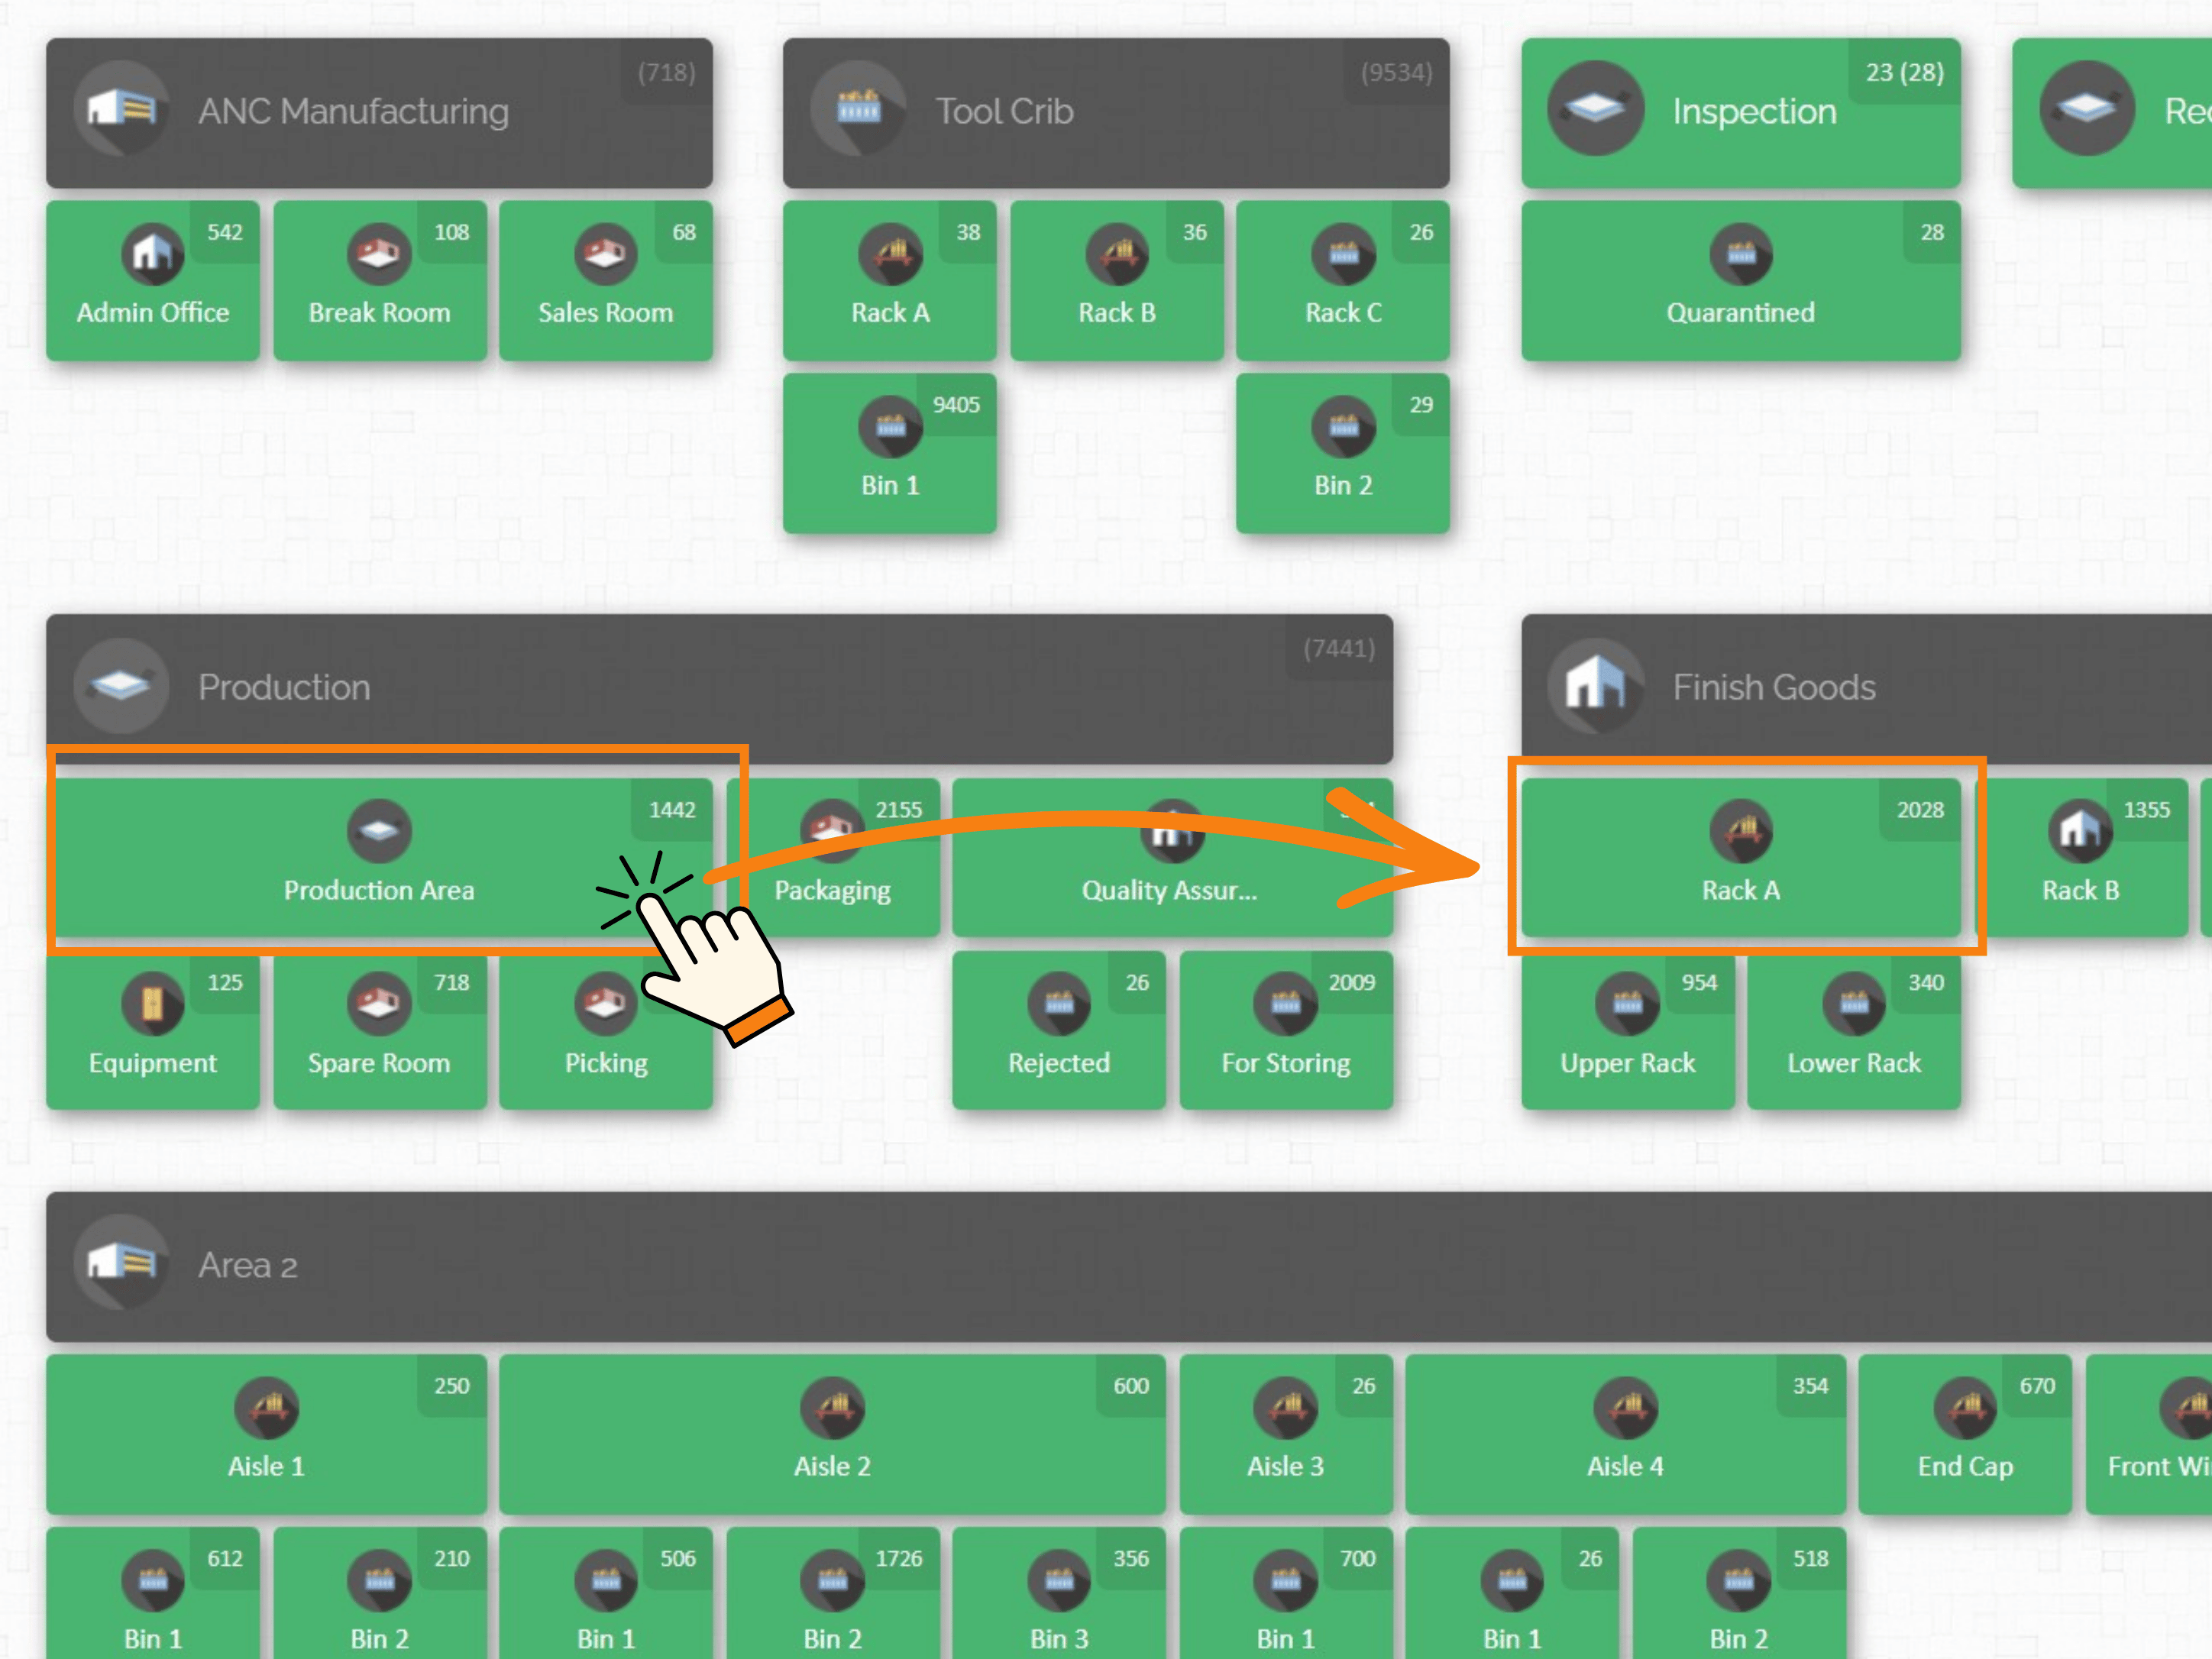
Click and hold the source location, then drag it to the destination location.
In the example below, Production Area is the source location, and Rack A is the destination location.
Step 2: Review the Transfer Window
A window will appear with two panels representing the source location and the new location:
The left panel shows the source location and all available products stored there.
The right panel shows the new location where the products will be transferred.
Step 3: Click the ‘Import From File’ Button
You'll find this button in the upper-right corner of the window.
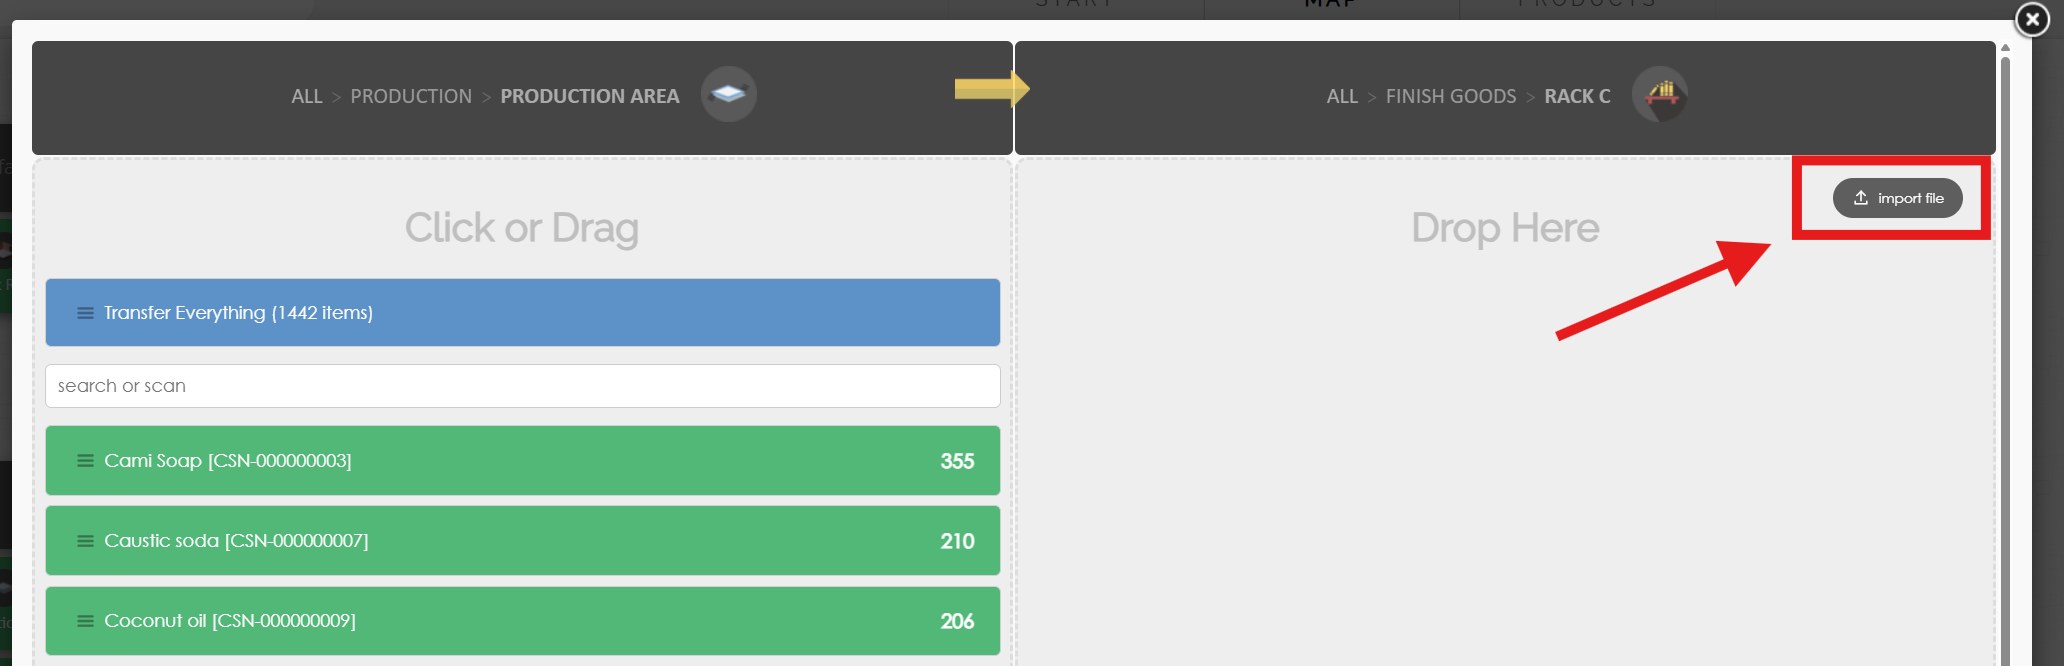
Click the "Import File" button.
Select and upload a CSV file (e.g., SAMPLE CSV FILE) and then click Next.
You can create a CSV file using spreadsheet software like Microsoft Excel
Step 3: Match the fields
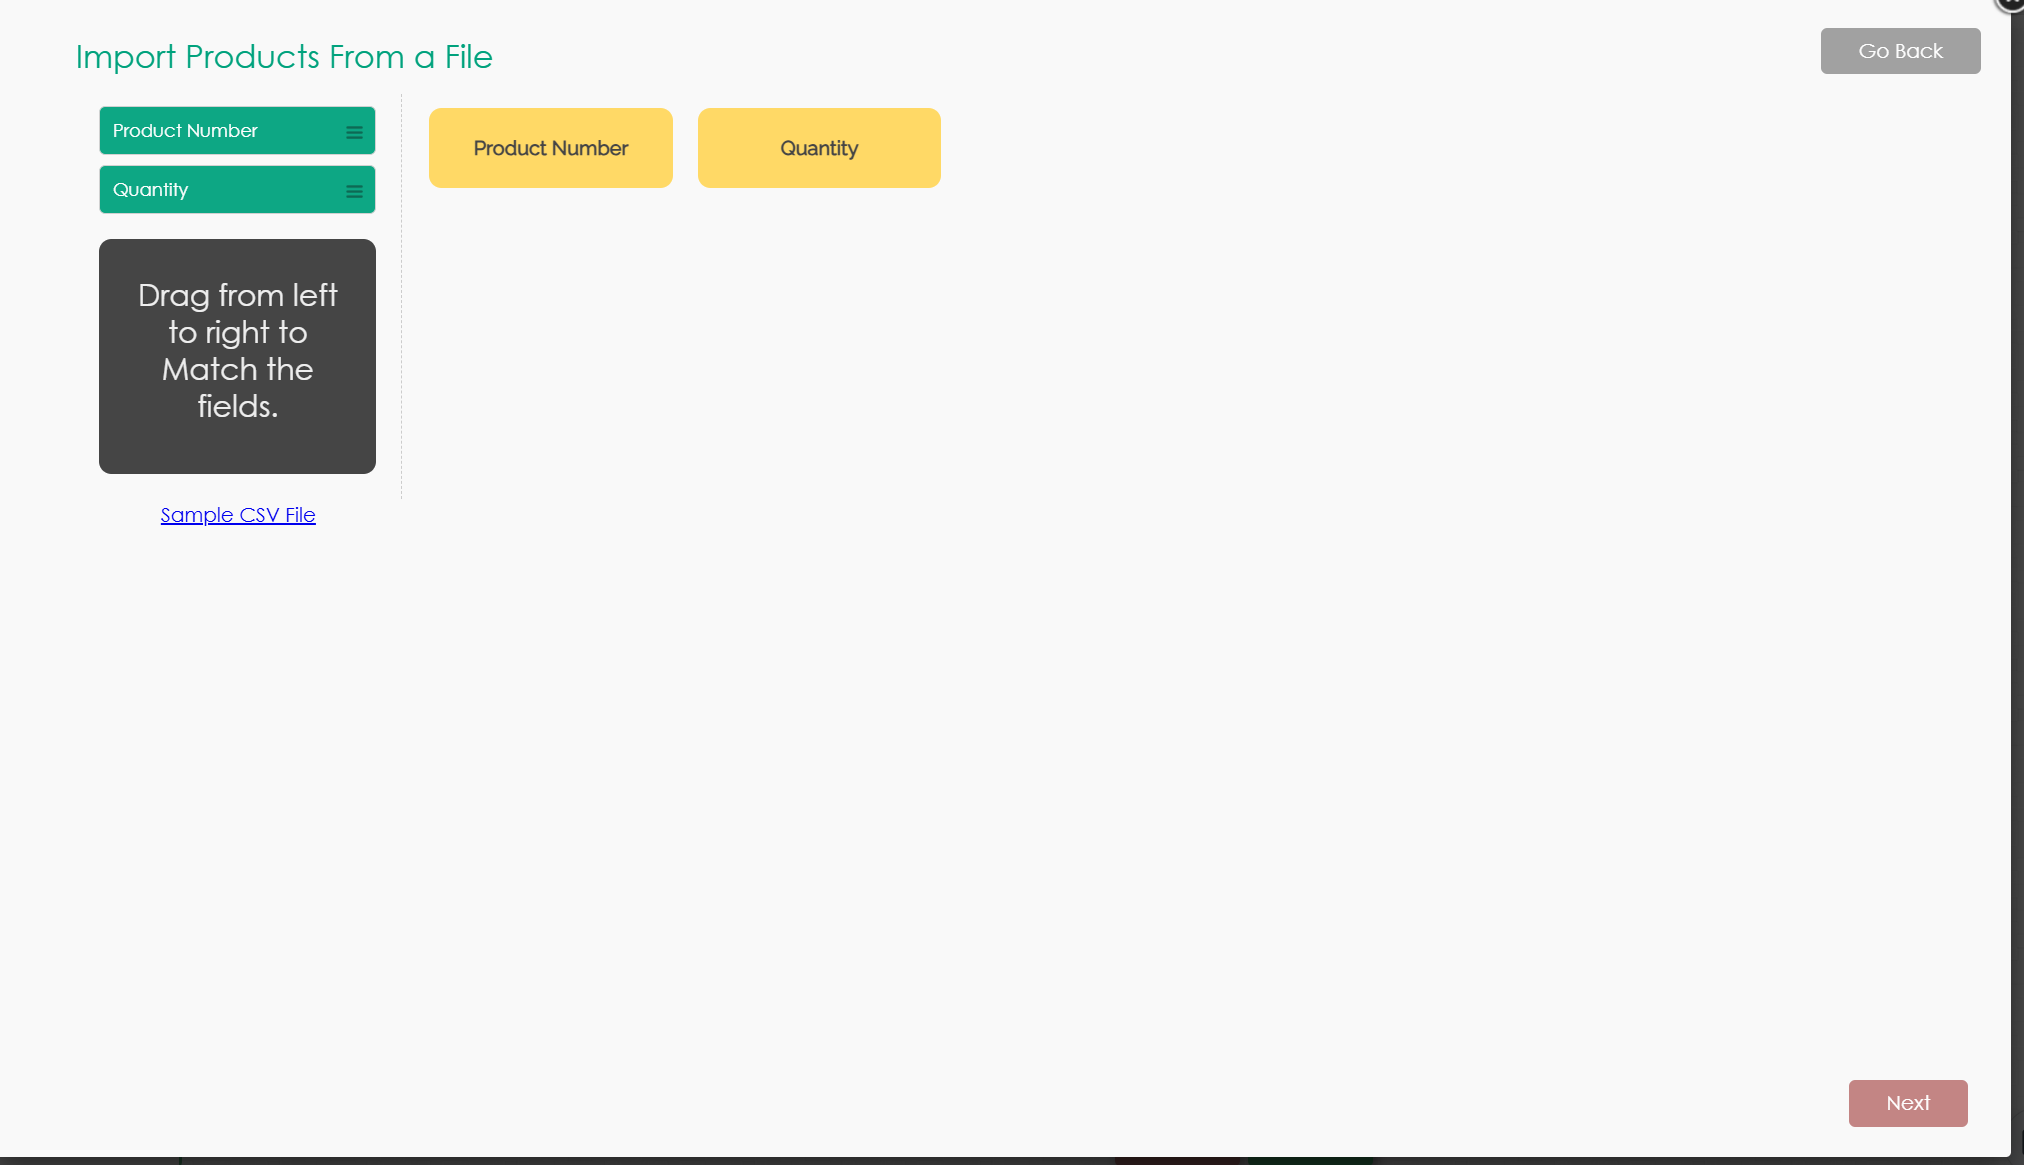
CyberStockroom will automatically detect the fields from your spreadsheet.
The detected fields will appear on the left side of the screen.
Match the Product Number and Quantity fields to their respective columns. (Click, hold, and drag the fields)
Click Next to proceed.
Step 5: Complete the transaction
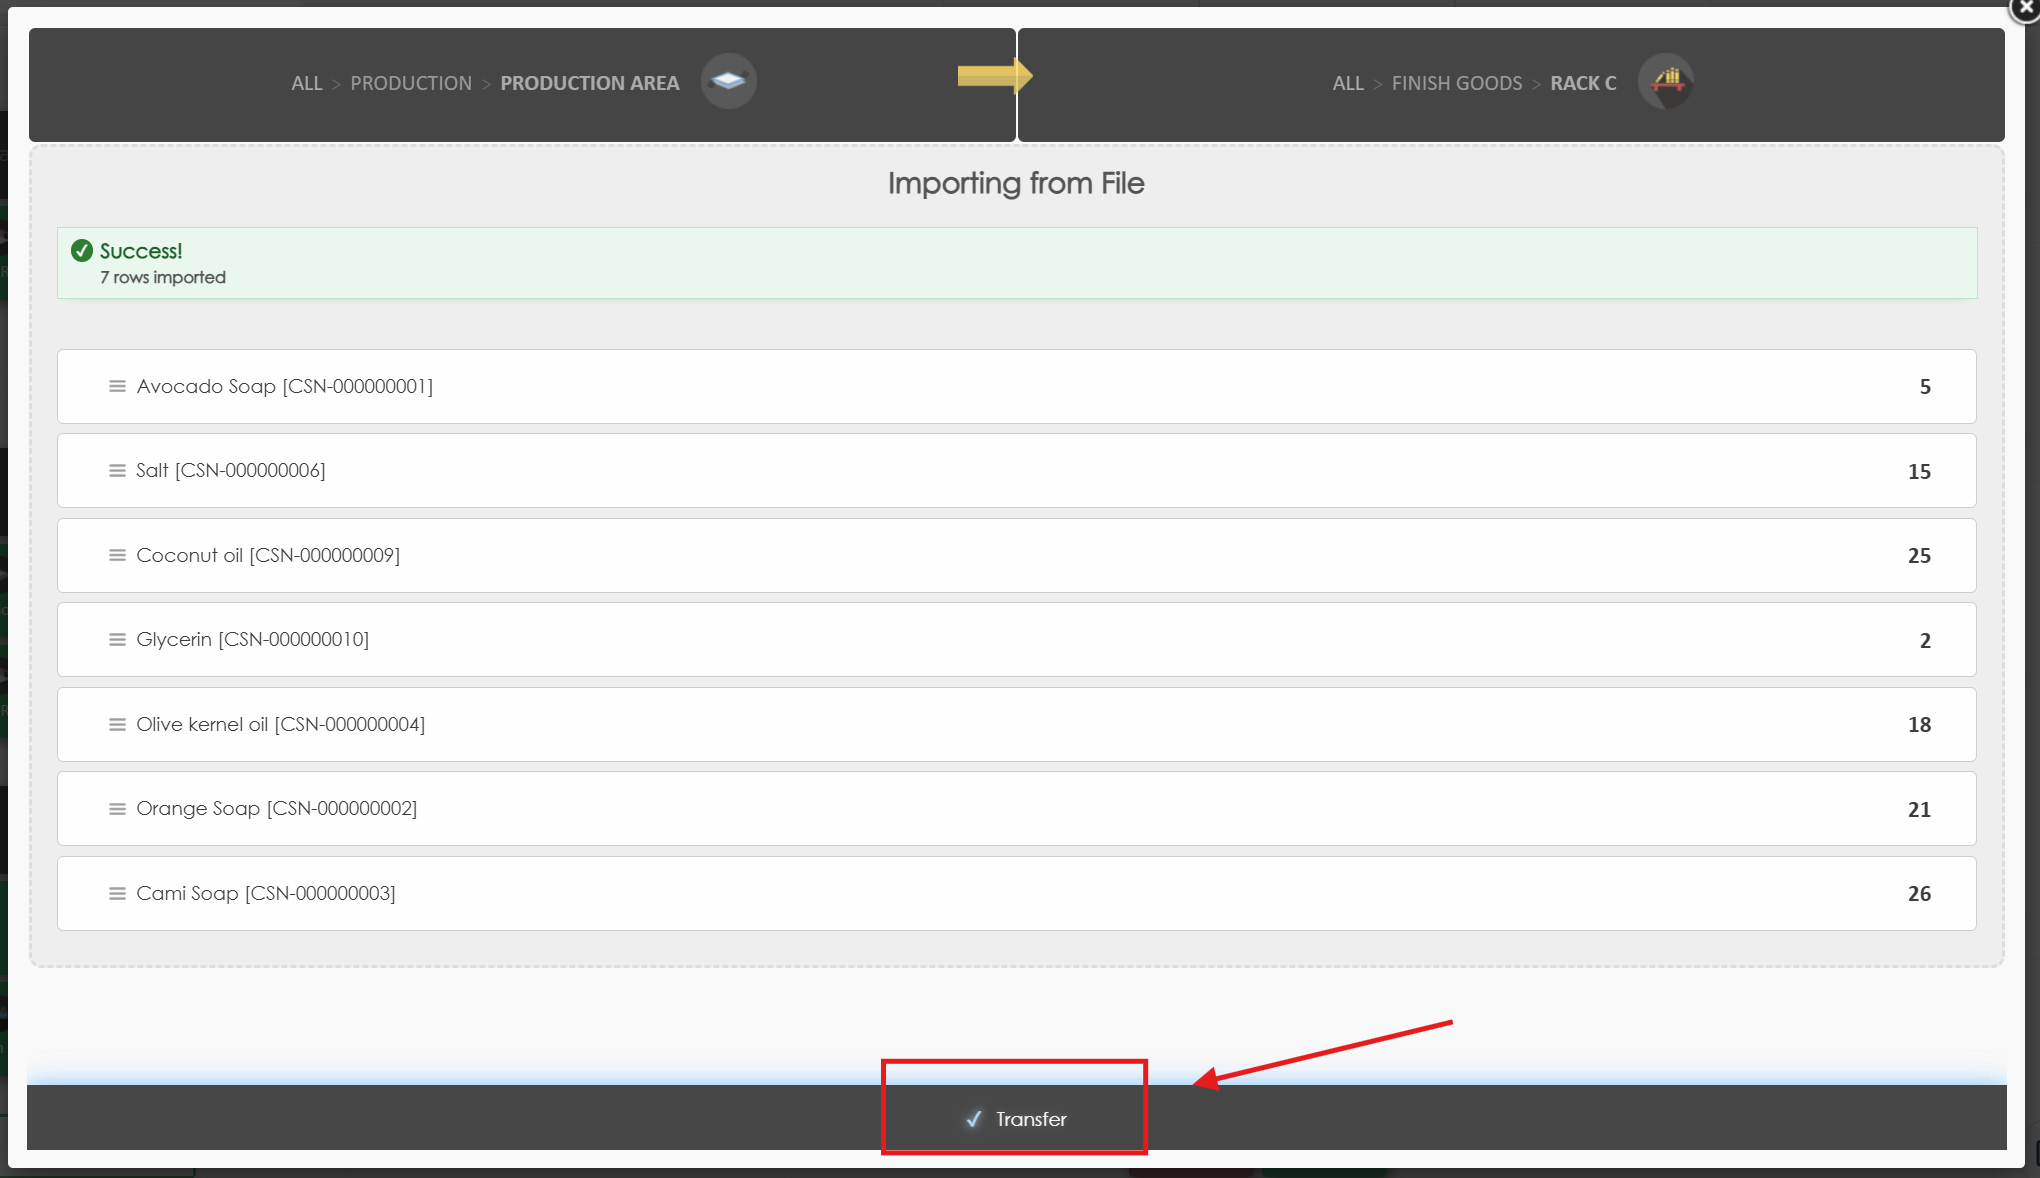
The window will show you the list of product that will be transferred.
Click the transfer button tto complete the transaction.