Transferring Products by Dragging and Dropping on the Map
Transferring products within the map is easier. Instead of editing the product list in the original location and then editing it again in the new location, you can simply drag and drop the products.
Step 1: Select the Source and Destination Locations
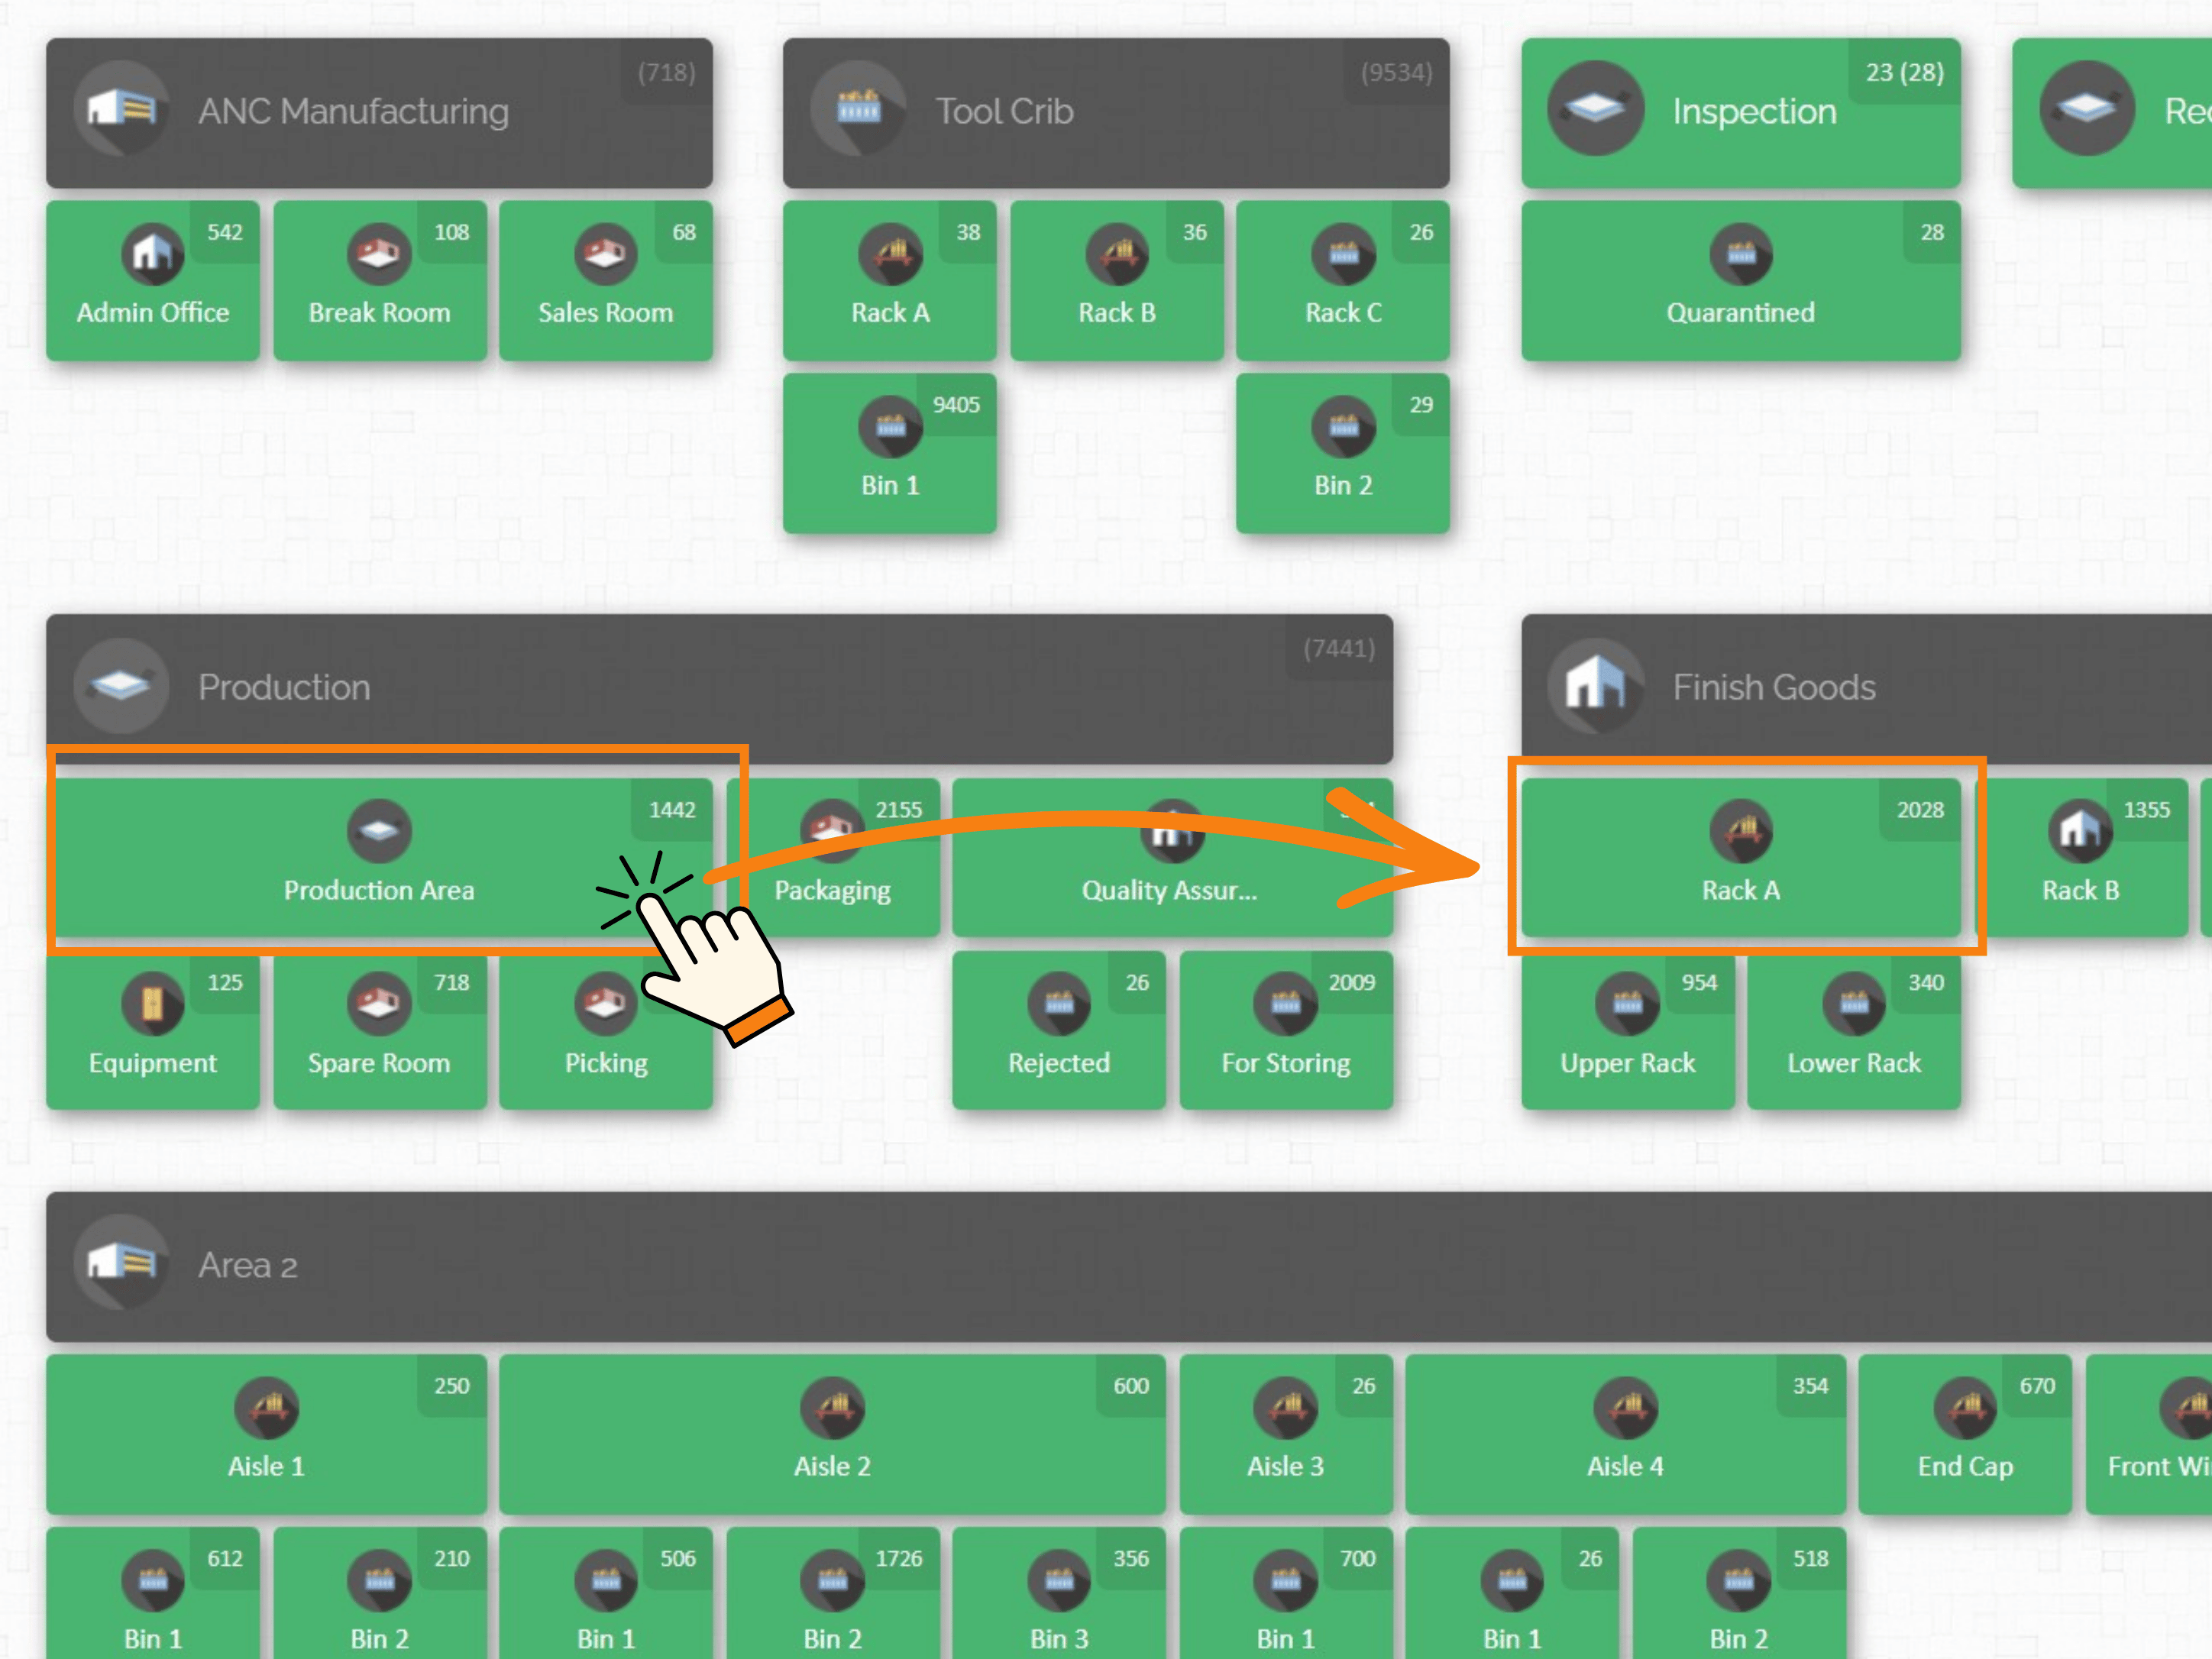
Click and hold the source location, then drag it to the destination location.
In the example below, Production Area is the source location, and Rack A is the destination location.
Step 2: Review the Transfer Window
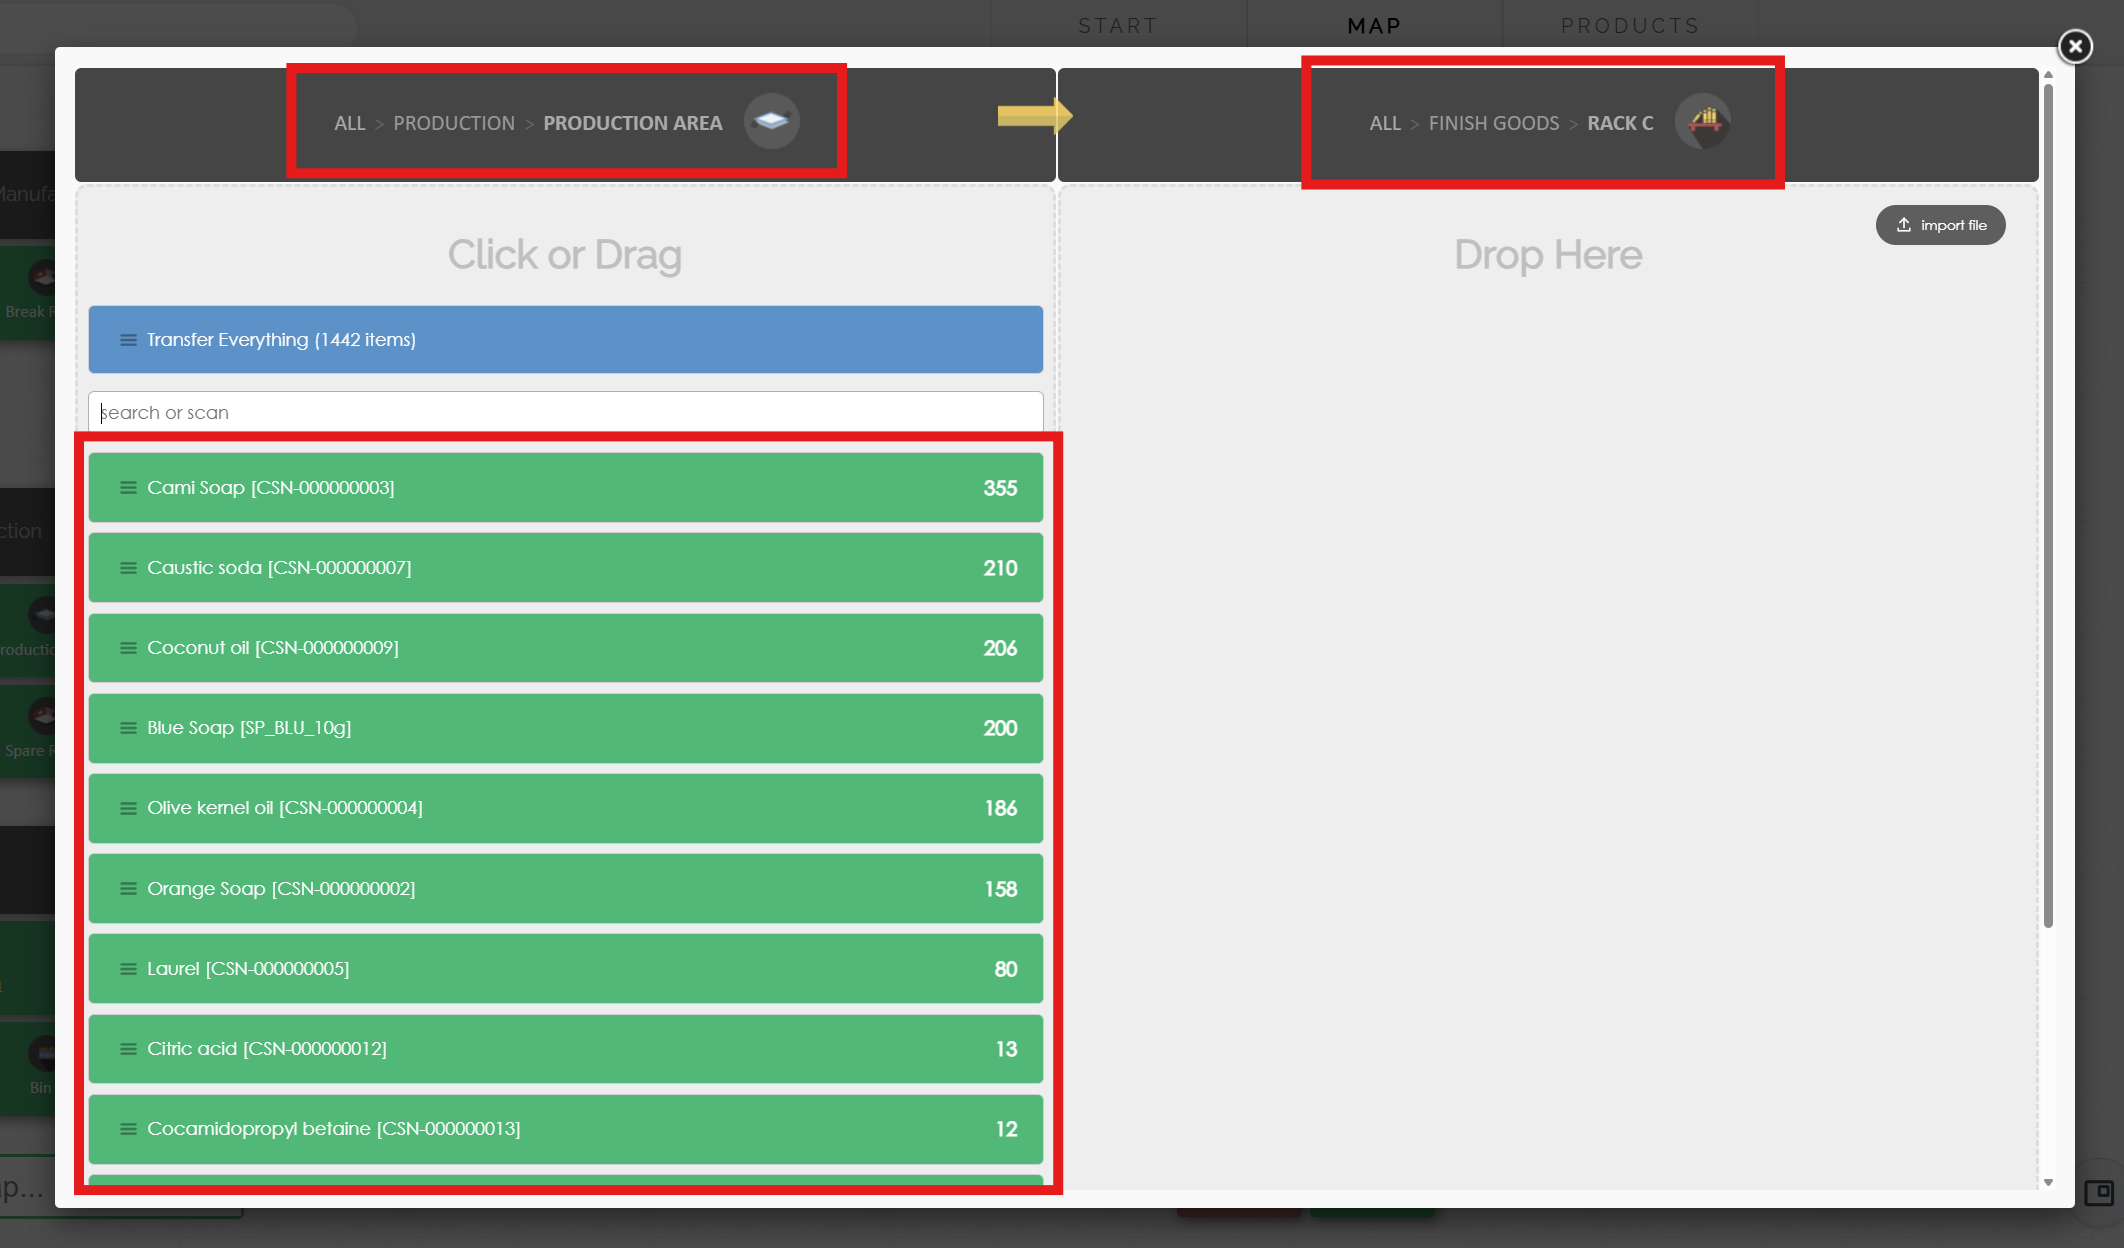
A window will appear with two panels representing the source location and the new location:
The left panel shows the source location and all available products stored there.
The right panel shows the new location where the products will be transferred.
Step 3: Select the Products You Want to Transfer
Select the product you want to transfer from the source location, then move it to the right panel.
You can click or drag products to the right depending on how much inventory you want to transfer:
Click a product to transfer one unit at a time.
Drag a product to transfer the entire available quantity.
Click the quantity to manually enter the amount you want to transfer.
Once the transfer is completed, the inventory will be deducted from the source location and added to the new location.
You can also use the search field to find a product by:
Entering the product name
Entering the product number
Scanning the product with a barcode scanner
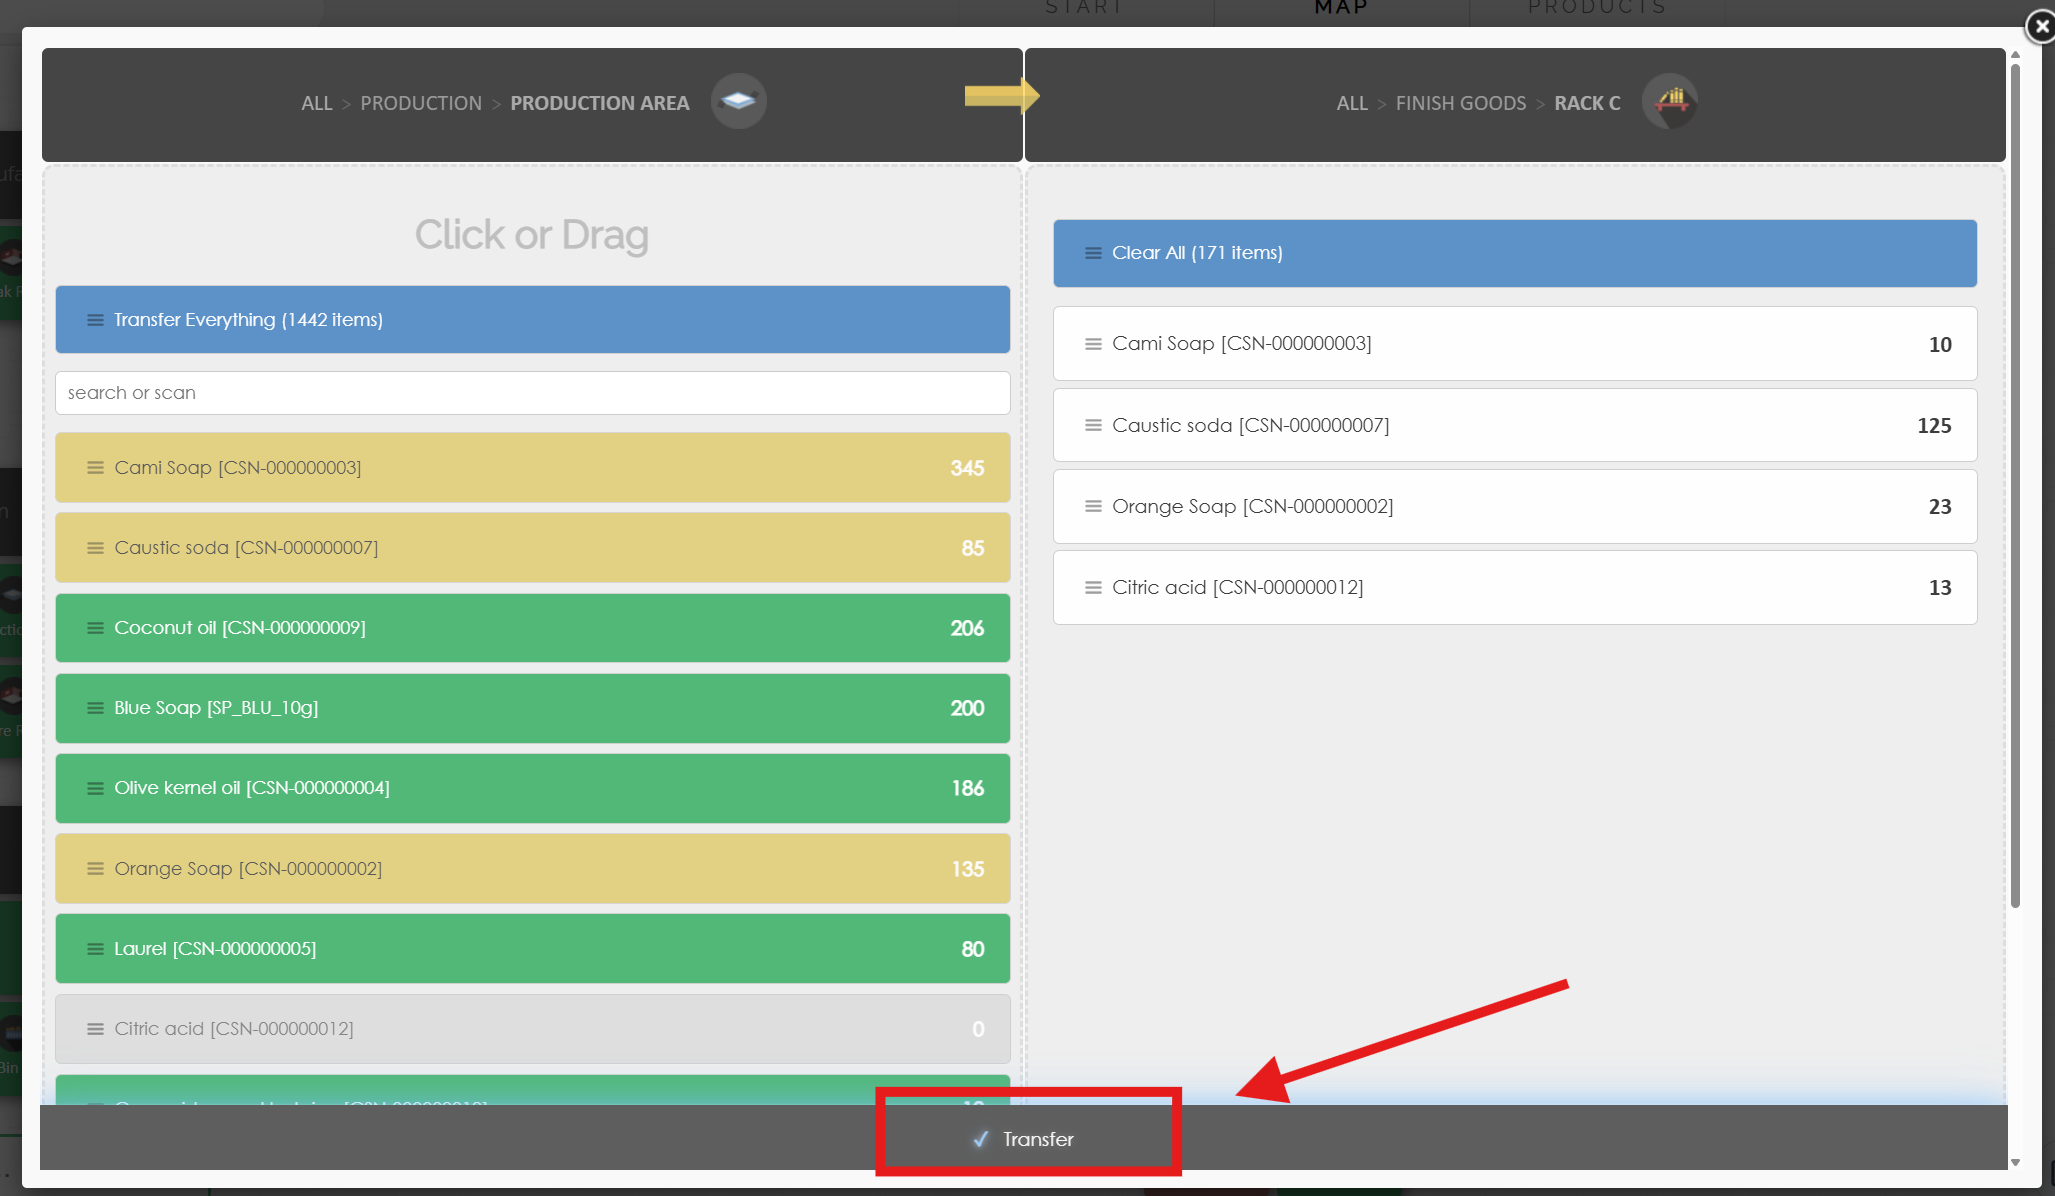
Step 4: Complete the Transfer
Once you have selected all the products and quantities, click the Transfer button to complete the transfer.
You can also leave a note about the transfer. Adding a note is not required, but it is recommended because it provides additional context for the transaction history.