Accessing the Check-In Window
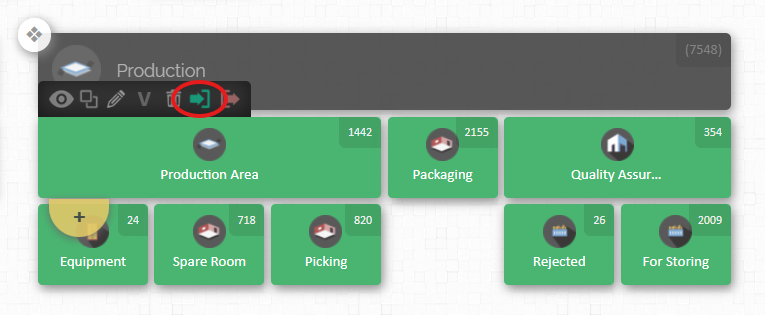
From the Map dashboard, hover your cursor over your preferred location and wait for the option buttons to appear. Click the CHECK IN button, which is the green forward icon, and the window will appear.
In the check-in window, you will see the action you are performing on the left and the location you selected on the right.
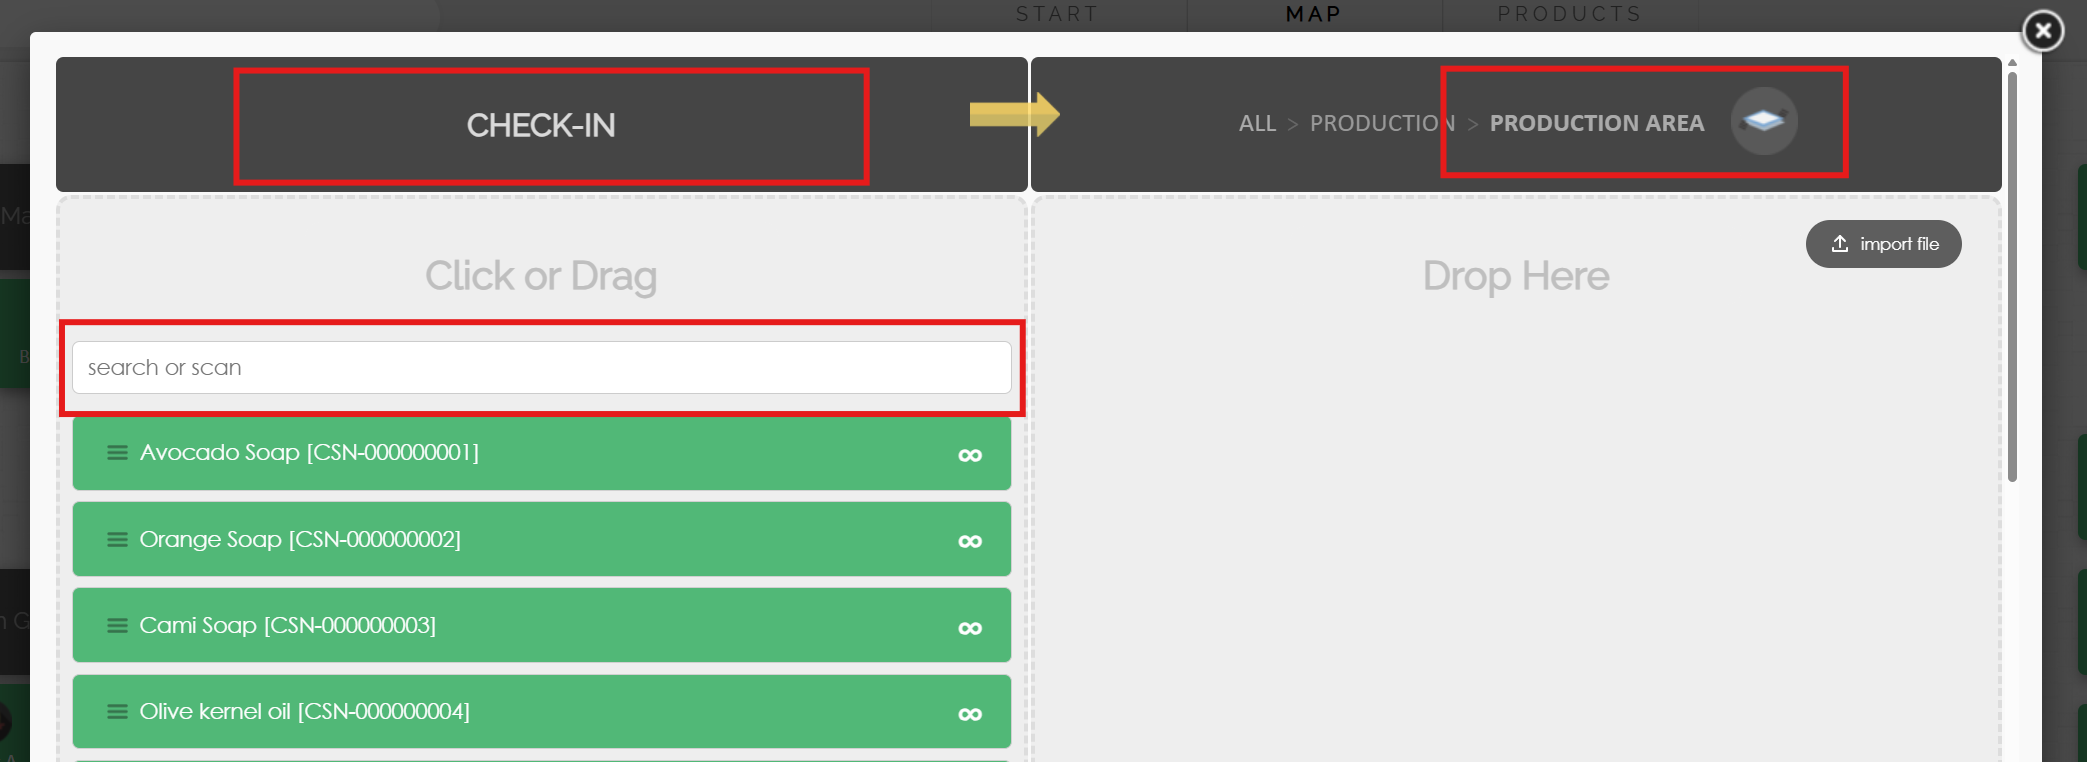
On the left panel, above the product list, you will see the search and scan field.
You can use this field to manually search for a product by typing the product name. You can also use a barcode scanner to scan the barcode of the product you want to check in.
The search field is designed to make finding products easier. It helps you locate products from the list without scrolling through the entire list manually.
From this window, you can start checking in products in three different ways:
Click a product to check in one unit at a time. Each click increases the quantity.
Click, hold, and drag the product from the left panel, then drop it into the right panel. Each transfer increases the quantity.
Click the infinite icon (∞) at the end of each product name. A window will appear where you can enter your preferred quantity. Click the Check In button to add the product to the right panel.
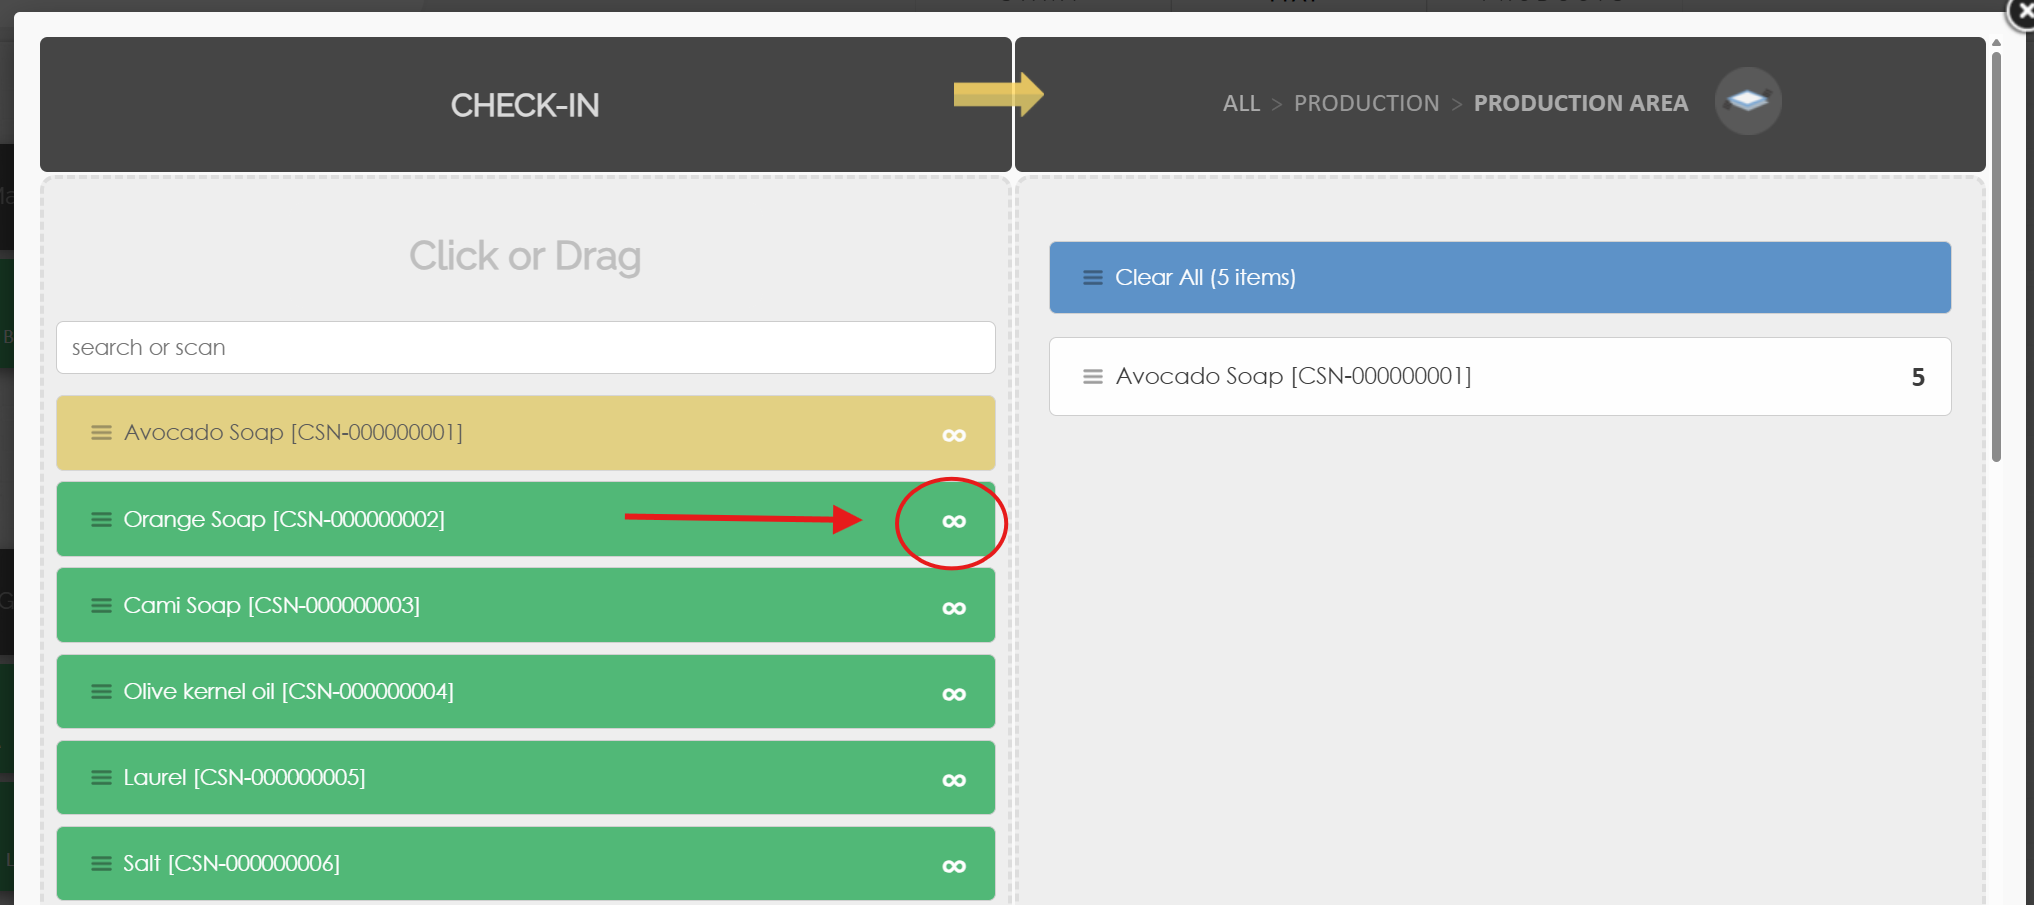
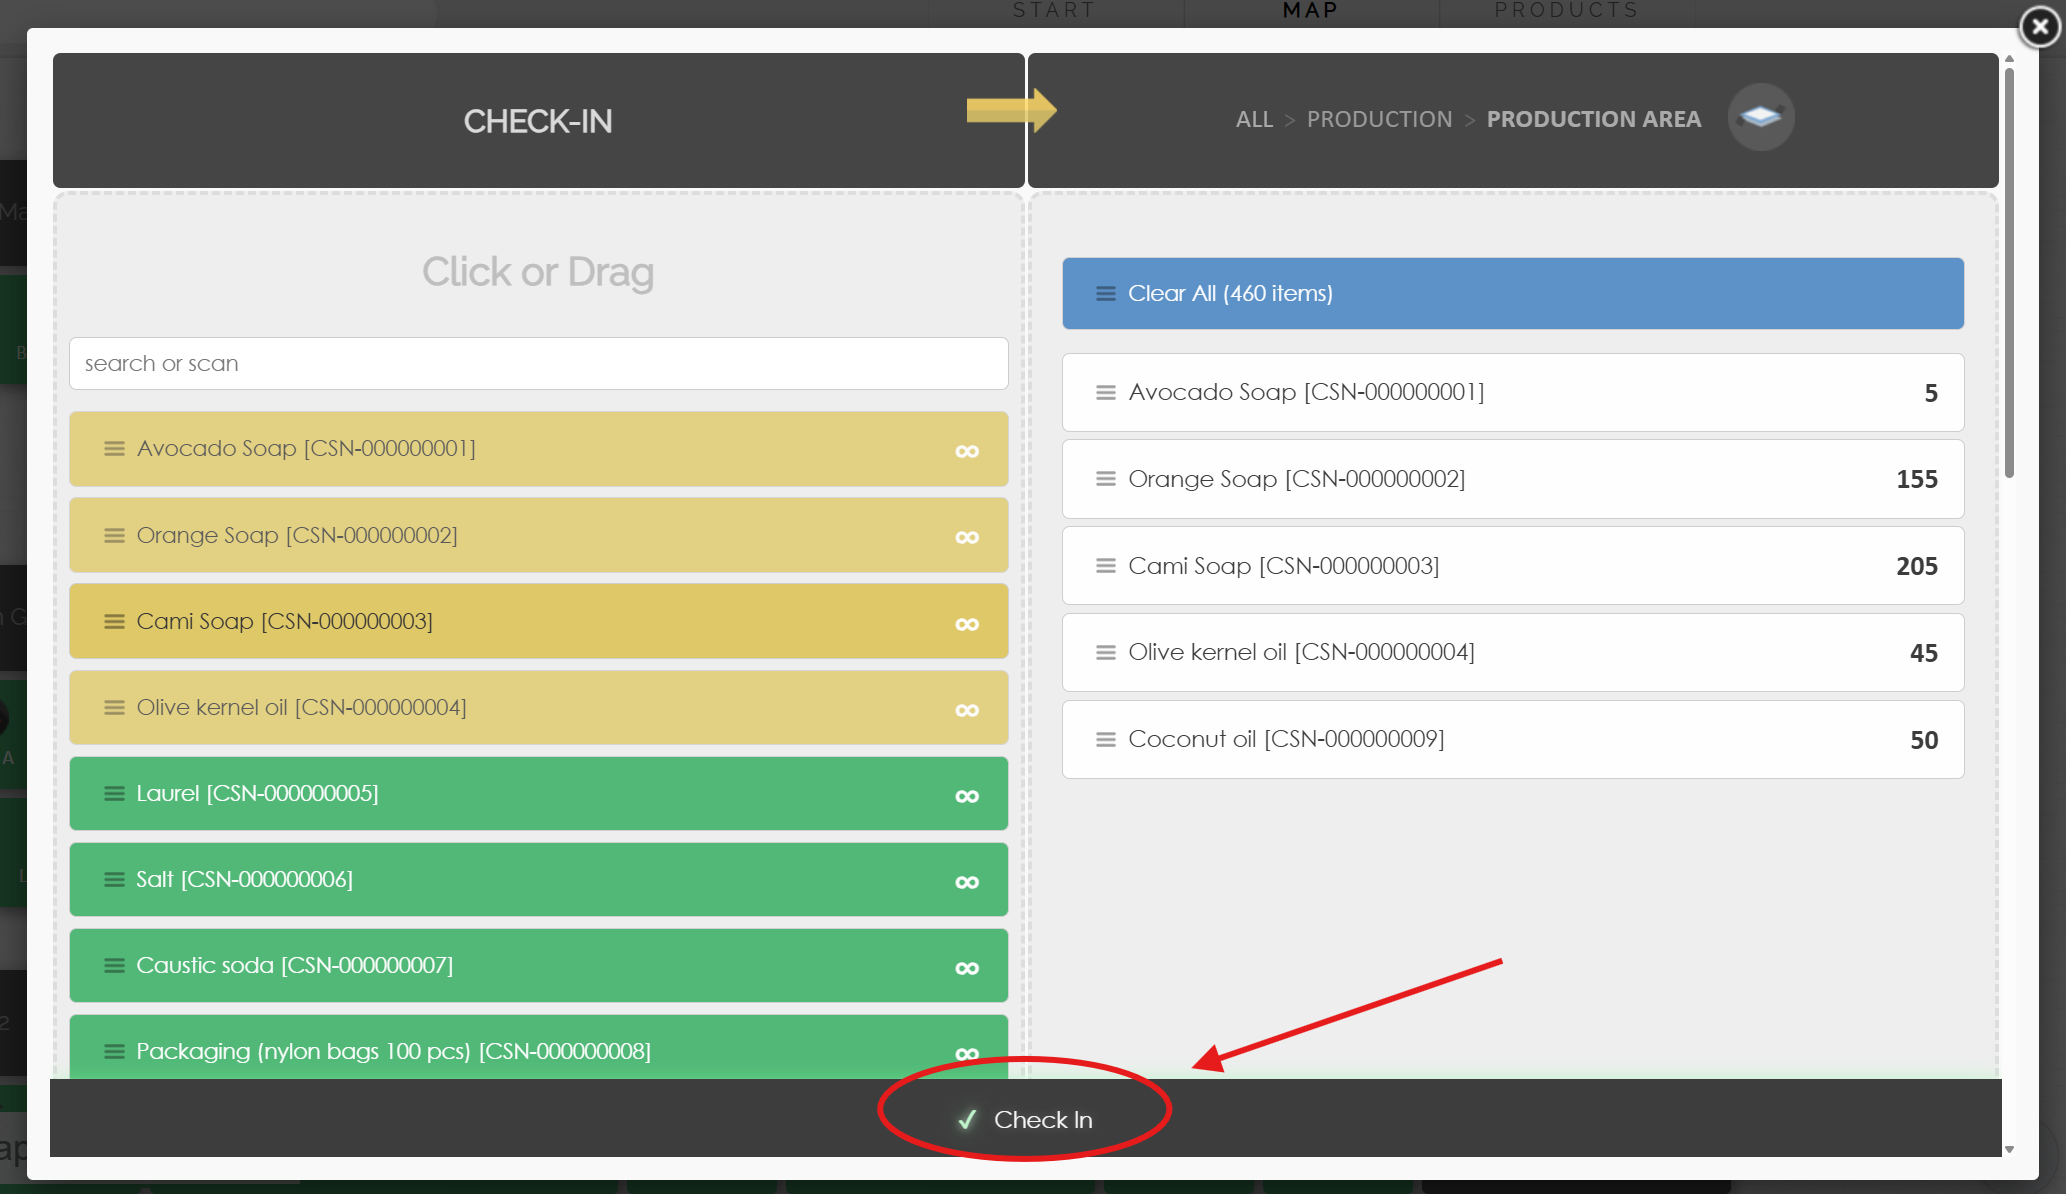
Once the all the preferred products are added to the right panel, click the Check In button at the bottom of the window to save your entry.